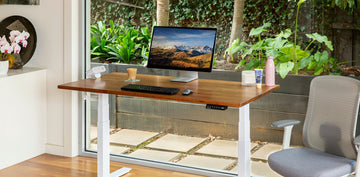
An ergonomic desk setup can make a workday feel shorter, your body feel better, and your focus last longer. It also prevents strain, supports posture, and helps your workspace function better.
This guide explains key adjustments, shows clear diagrams, lists useful tools, and highlights common mistakes. Whether you work from home or in an office, you’ll learn how to set up a desk that keeps you productive and pain-free.
Why Ergonomics Matter for Your Desk Setup
An ergonomic desk setup affects your health and productivity, not only your comfort. A poorly arranged workstation can lead to muscle fatigue, poor circulation, and chronic pain. Small posture mistakes while sitting or typing can cause serious pain over time.
The Impact of Poor Ergonomics on Your Body
Prolonged exposure to an improperly configured workspace strains your neck, shoulders, and lower back. Many people experience discomfort without realizing that their desk or chair is the cause. Repetitive movements, unsupported limbs, and misaligned screens all contribute to pain and stiffness that build slowly.
Neck tilt from low screens, unsupported lower backs, and wrist extension during typing all contribute to long-term discomfort. Bad desk ergonomics can lead to cumulative stress injuries that affect joints, nerves, and circulation.
Benefits of an Ergonomic Workstation
Correcting your setup prevents problems and brings noticeable improvements to how you feel and perform throughout the day.
Better posture
An ergonomic setup supports your spine’s natural curves. Proper back and foot support helps you maintain a neutral position, reducing stress on muscles and joints.
Reduced injury risk
Aligning the body correctly minimizes repetitive strain. Supporting wrists and lowering shoulder tension can prevent musculoskeletal disorders from developing.
Less fatigue
Physical discomfort drains energy. A setup that supports movement and avoids awkward angles helps you stay alert longer.
Increased productivity
Discomfort distracts. An ergonomic setup helps you focus on tasks instead of pain. You get more done with less strain.
Improved circulation and eye comfort
Straight posture improves blood flow and reduces body pressure. Adjusting screen height and body position encourages healthy movement and supports standing desk benefits such as reduced eye strain and better balance between sitting and standing.
Quick Diagram: Correct Ergonomic Desk Setup
Learning desk ergonomics starts with seeing how each part fits together. A well-labeled diagram makes it easier to arrange your chair, monitor, keyboard, and accessories in positions that support comfort and efficiency.
🖥️ Monitor
─────────────────────────────
• Top of screen at or just below eye level
• Arm’s length away (about 50–70 cm)
• Tilted slightly upward (10–20°)
🪑 Chair
─────────────────────────────
• Seat height allows feet to rest flat
• Knees at 90°, hips slightly above knees
• Backrest supports lower back’s natural curve
• Armrests support forearms with relaxed shoulders
⌨️ Keyboard & 🖱 Mouse
─────────────────────────────
• Elbows at 90°, close to the body
• Forearms parallel to the floor
• Keep wrists straight, not bent in any direction.
• Place the mouse beside the keyboard at equal height.
🦶 Foot Position
─────────────────────────────
• Feet flat on floor or footrest
• Avoid dangling legs or pressure behind knees
🧾 Documents & Accessories
─────────────────────────────
• Place documents at monitor height using a stand
• Frequently used items stay within easy reach
• Leave space under desk for leg movement and knee clearance
Chair, Monitor, Keyboard and Mouse Positioning
Adjust the ergonomic chair so your feet rest flat on the floor and your knees bend at a right angle. Your hips should be slightly higher than your knees, with your lower back supported by the chair’s lumbar curve. Armrests, if used, should allow your shoulders to stay relaxed and your elbows to bend at 90 degrees.
Set the desk height to keep your forearms parallel to the floor while typing. Your wrists should remain straight and level with the keyboard. Keep the mouse close, at the same height as the keyboard, to avoid reaching or twisting your arm.
The monitor should sit directly in front of you, an arm’s length away, with the top of the screen at or slightly below eye level. Angling the screen upward slightly helps maintain a natural gaze. These adjustments follow the same principles as those used in a standing desk setup, where alignment and position are key to reducing fatigue.
Step-by-Step Workstation Setup Checklist

You don’t need to rebuild your office to set up an ergonomic desk. A few targeted adjustments, made in the right order, can significantly improve comfort and reduce long-term strain. Use this step-by-step checklist to fine-tune each part of your workstation.
Step 1 – Chair Height, Back Support, and Armrest Position
Start by adjusting your chair so your feet rest flat on the ground or on a footrest. Your knees should be level with or slightly below your hips, forming an open angle that promotes circulation. Adjust lumbar support to follow the natural S-curve of your spine, and position the backrest to support your mid to lower back without pushing you forward.
Armrests should allow your shoulders to remain relaxed. Elbows should bend at 90 degrees and hover close to your torso, not flaring outward. If armrests lift your shoulders or block your desk, lower or remove them.
Step 2 – Desk and Keyboard Height for Neutral Wrists
The ideal standing desk height allows your elbows to stay at a 90-degree angle while typing. Wrists should remain flat and straight, aligned with your forearms. Avoid tilting them up or down. If your desk is too high and not adjustable, use a keyboard tray or lower your chair and add a footrest to maintain proper leg position.
An adjustable standing desk is especially effective here because it lets you fine-tune the height to match your body, whether you're sitting or standing. This flexibility supports neutral wrist alignment throughout the day and makes it easier to shift positions without disrupting your posture.

Step 3 – Mouse Placement for Shoulder and Wrist Relief
Place the mouse at the same height and close to the keyboard to avoid overreaching. Keep your wrist straight while using it, and rest your arm on the desk or armrest for support. A compact keyboard can help bring the mouse closer, reducing the strain on your dominant shoulder.

Step 4 – Monitor Height, Distance, and Tilt
Position the monitor so the top of the screen is at or just below eye level. Keep it about an arm’s length away, tilted slightly upward to match your natural gaze. It reduces neck strain and keeps posture correct. If you use multiple monitors, place the primary one directly in front of you and angle secondary screens toward your line of sight.
Step 5 – Document Placement and Work Surface Layout
Documents should be placed at the same height and distance as your monitor whenever possible. Use a document holder or ramp to avoid excessive head turning or downward gazing. Keep the items you use most within arm’s reach, and leave clear knee space under the desk. Whether you're working on an “L” shaped surface or a straight desk, organizing the layout around your dominant hand reduces unnecessary movement.

Visual Ergonomics and Eye Strain Prevention
Visual comfort is a key part of an ergonomic desk setup. Staring at a screen for hours without the right adjustments can cause eye strain, headaches, and mental fatigue. A visual setup that supports your eyes makes work easier and lowers strain.
Monitor Brightness, Font Size, and Glare Control
The monitor should be bright enough to read comfortably without becoming harsh. Aim for a brightness level that matches the surrounding light, neither too dim nor overly vivid. Adjust contrast settings to sharpen text and reduce eye strain while reading.
Font size matters more than people think. If you’re leaning in or squinting, increase the size or adjust zoom levels in your browser or apps. Clear, legible text reduces eye fatigue, especially during extended reading or spreadsheet work.
Glare can come from windows, overhead lights, or glossy screens. Use a matte screen filter if needed, and angle the monitor so you’re not facing direct light sources. To reduce visual distractions, clean your screen regularly and keep background visuals minimal.
Lighting Placement and Window Positioning
The goal is to balance natural and artificial light without causing glare. Place your monitor perpendicular to windows when possible, rather than directly in front of or behind them. This helps maintain even lighting on the screen.
Desk lamps should provide soft, indirect light aimed at the desk surface, not the screen. Light should come from the side opposite your dominant hand to avoid casting shadows. If needed, adjust blinds or curtains to control daylight exposure throughout the day.
Proper monitor height and screen distance also reduce strain on the eyes and neck. Small changes in ergonomic monitor height ease tension and improve focus. Maintaining good posture at a standing desk also helps keep your eyes level with the screen, which reduces tilt and prevents fatigue.

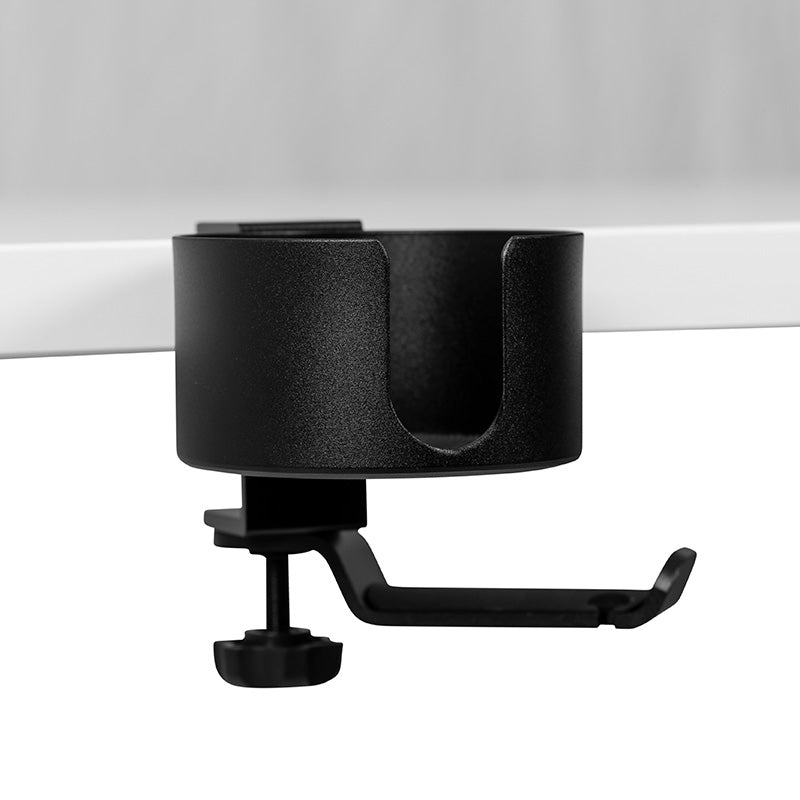
Small Fixes with Big Impact: Ergonomic Accessories
Even if your desk and chair are well-aligned, small accessories can make a meaningful difference. These additions support posture, reduce strain, and make your setup feel more complete. They’re often the easiest and fastest upgrades to implement.
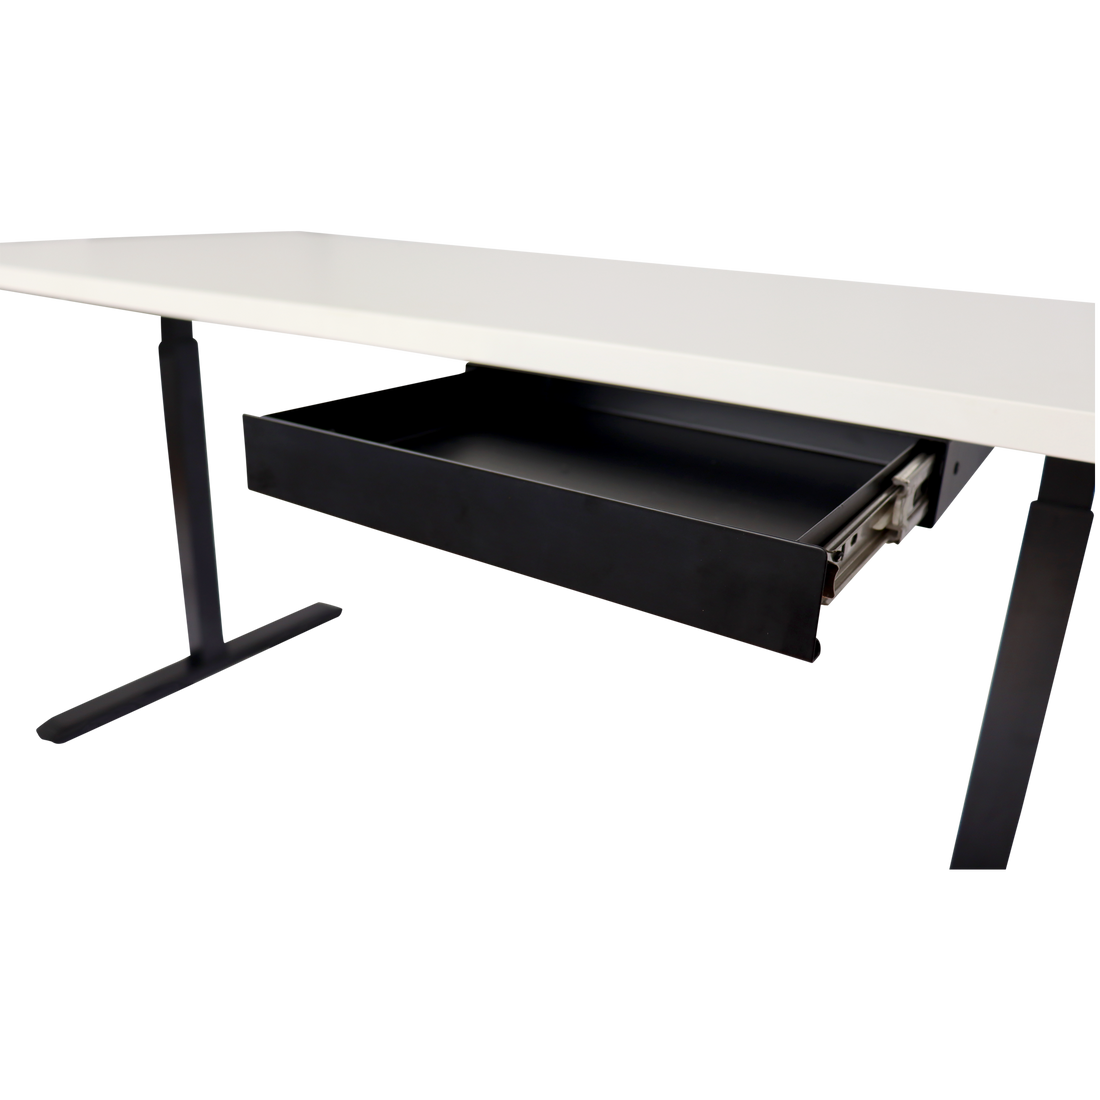
Keyboard Trays, Footrests, and Anti-Fatigue Mats
A keyboard tray helps you keep your wrists in a straight, neutral position while freeing up desk space. It’s especially useful when your desk is fixed-height or lacks depth. Look for a tray that tilts slightly downward to reduce wrist extension during typing.
Footrests are helpful when your feet can’t rest flat on the floor. They reduce pressure behind the knees and improve lower-body circulation. Adjustable models allow you to fine-tune the height and angle based on your chair position.
If you use a standing desk, an anti-fatigue mat can reduce discomfort from prolonged standing. The soft surface helps your legs move slightly and improves blood flow.
Split Keyboards and Ergonomic Mice
A split keyboard lets you position each half at shoulder width, keeping your arms in a relaxed, neutral position. This reduces internal shoulder rotation and wrist strain, especially during long typing sessions. Look for models with adjustable tenting or negative tilt options for added flexibility.
Ergonomic mice vary in shape, but the key idea is to reduce wrist and forearm movement. Vertical mice allow your hand to rest in a handshake position, which minimizes pronation. Trackballs or pen-style designs offer alternatives that further reduce repetitive motion.
These accessories improve comfort without replacing your main desk or chair.
Movement and Breaks: Reduce Strain Throughout the Day
Movement helps more than even the best desk setup. While standing desks offer clear health benefits, staying in one position too long, whether seated or upright, still stresses muscles and joints. Regular breaks, posture changes, and light stretches help prevent fatigue and improve focus.
Micro-Breaks and the 20-20-20 Eye Rule
Micro-breaks give your body a chance to reset. Every 20 to 30 minutes, shift your posture, stretch your arms, or take a few steps. Short breaks relax tight muscles and improve circulation.
To reduce eye strain, follow the 20-20-20 rule: every 20 minutes, look at something 20 feet away for 20 seconds. This gives the eye muscles a rest from screen focus and helps maintain long-term visual comfort.
The 30-30-1 method, which involves looking at a distant object for 30 seconds to 1 minute every 30 minutes, is also widely used. Both approaches are recognized in visual ergonomics and offer flexibility depending on your screen habits and workflow.
Ideal Break Frequency for Sitting and Standing
Switching between sitting and standing is better than using just one position. If you use a sit-stand desk, aim to change positions every 30 to 60 minutes. Alternate between sitting, standing, and moving, using your body’s cues to guide you.
While standing, shift your weight, stretch your calves, or walk briefly in place. When seated, stretch your back, roll your shoulders, and avoid locking your knees or ankles. Small posture changes lower joint pressure and reduce tired muscles
Ergonomic-Friendly Stretches You Can Do at Work
A few light stretches can go a long way. Extend your arms overhead, roll your neck gently side to side, or stretch your wrists by pressing palms together. Stretch areas that feel tense, like your shoulders, hamstrings, and lower back.
You don’t need formal stretches at work. A quick stretching routine for standing desk users fits easily into short breaks and helps improve posture, reduce soreness, and restore mental focus.
Common Ergonomic Mistakes to Avoid
Even with the best intentions, it’s easy to overlook subtle mistakes that affect comfort and posture. Finding these mistakes helps fix your setup and stops small problems from becoming long-term pain.
Bad Wrist Angles and Keyboard Placement
Typing with wrists bent upward or outward places strain on tendons and nerves. Keep your wrists level and aligned with your forearms, without resting them on hard surfaces while typing. Position the keyboard directly in front of you and close enough that your elbows stay at your sides.
A common mistake is using a keyboard that’s too high or flat on a thick desk surface. A tray or an adjustable-height desk can help bring the typing surface down to a comfortable level. Wrist pain and tight shoulders often trace back to improper keyboard positioning, as discussed in desk ergonomics fundamentals.
Incorrect Monitor Position or Glare
Monitors that sit too low encourage forward head posture, while screens placed too far away cause leaning or squinting. Both habits add pressure to the neck and upper back. The top of the screen should be at or just below eye level, with the monitor directly in front of you to avoid head rotation.
Glare from windows or overhead lights can also lead to eye strain and posture shifts. Reposition your screen or adjust lighting to prevent reflections. Matte screen protectors or anti-glare filters can help, especially in bright environments.
Ignoring Discomfort and Posture Red Flags
Physical discomfort is often the first sign of an issue, not something to push through. Tension in your neck, tingling in your hands, or lower back pain after working are all signals to reassess your setup.
Small aches may seem minor at first, but can lead to long-term injuries if left unaddressed. Tools that correct posture or reduce repetitive strain make a noticeable difference. Revisiting the basics of bad desk ergonomics can help pinpoint what to adjust.
Final Thoughts: Build a Workstation That Works for You
A well-designed ergonomic setup supports your body without getting in the way. You don’t need a perfect setup, just one that eases discomfort and supports longer, more comfortable work sessions.
When to Upgrade Your Setup
If you’ve made small changes and still notice recurring discomfort, it might be time to invest in better equipment. If wrist, neck, or back pain stays after correcting posture, your setup may have deeper issues.
You don’t need to upgrade right away or spend a lot. Start with the elements that affect you most. That could mean raising your monitor, getting a chair with real lumbar support, or switching to a more natural mouse shape. The right tools improve focus and reduce fatigue over time.
Ergonomic Products from UpDown Desk That Make It Easy
High-quality ergonomic equipment takes the guesswork out of setup. Adjustable desks help you switch between sitting and standing, keeping your body active. Desk converters are another practical option when replacing your entire workstation isn’t feasible.
Chairs with adjustable seat height, armrests, and lumbar support make it easier to find a balanced posture. Adding accessories like footrests or monitor arms fine-tunes your position further. For reliable options, explore UpDown Desk’s range of adjustable desks and ergonomic tools designed to fit both home and office environments.
Frequently Asked Questions About Ergonomic Desk Setup
What Is the Correct Ergonomic Desk Height?
Desk height should allow elbows to bend at 90 degrees, keeping forearms parallel to the floor while typing with relaxed shoulders and straight wrists.
How Should You Sit at a Desk Ergonomically?
Sit with feet flat, knees at 90 degrees, back supported, and elbows close to your sides. Maintain a straight neck and neutral spine without slouching.
Can Poor Desk Ergonomics Cause Health Issues?
Yes. Poor ergonomics can lead to chronic neck, back, wrist, and shoulder pain, repetitive strain injuries, poor circulation, and long-term musculoskeletal problems.
What Is an Ergonomic Desk Setup Diagram and Why Is It Helpful?
It’s a visual layout showing the ideal placement of monitor, chair, keyboard, and accessories. Helps users position components correctly to prevent discomfort and strain.
Do I Need Ergonomic Accessories?
If your current setup causes discomfort, ergonomic accessories like footrests, keyboard trays, or monitor arms offer quick, affordable adjustments to improve posture and support.