Standing desks can be a major investment for some. So, what if you want a stand-up desk, but can’t afford a full, adjustable sit-stand desk?
We’ve got the answers to exactly that. With standing desk modification, you can turn your normal desk into a standing desk in no time, and without all of the overhead.
Check out our solutions for standing desk converters, as well as some nifty DIY options.
Converting Your Existing Desk
The easiest way to start standing up would be to convert your existing desk. Standard desks are generally too short to stand and work so you will need to find ways to make your desktop a bit higher.
The two methods for modifying your existing desk to standing height are listed below:
- Place something on top of your desk to raise the keyboard, mouse, and monitor.
- Place something underneath your desk to raise the total height of your desktop.
Both these methods work well for modifying your desk to an adjustable standing desk. Depending on what you have lying around the house, you might even be able to do this without paying a single cent.
That being said, we do recommend using a standing desk converter above all else. Converters are specially designed for the ergonomics of standing desk modification.
Standing Desk Converters
I’ve listed two types of standing desk converters below:
- Adjustable X Design
- Adjustable Z Design
Adjustable X Design
The X shape design calls most other designs into question because it provides such an improvement in operation, stability, and, most significantly, value for money.
Advantages
- A newer design that lifts and lowers without swinging toward you, providing unparalleled stability and smooth operation
- It is also endlessly adjustable within its range and has no fixed heights
- Far easier to convert your desk than any other method
- Specially designed for standing
- Plenty of workspace
Who It’s Right For
- Those looking for an easy, convenient modification solution
Adjustable Z Design
Previously, this was the sole option. Newer approaches are rapidly rendering this design obsolete.
Advantages
- Likely to have more affordable variants
- More options are available to suit your needs and tastes
- Specially designed for standing
- Plenty of workspace
Who It’s Right For
- Anyone on a bit more of a budget
How to Convert Your Existing Desk Into A Sit-Stand Desk
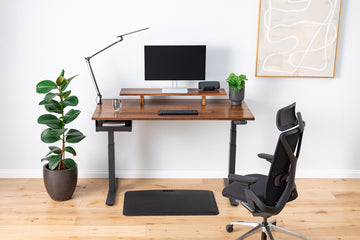
Converting your old desk into a fully adjustable sit-stand desk is easy and quick. It allows you to retain your existing desk/office setup without the need for adding a large bulky desktop converter to your workspace. Moreover, it also comes with the added benefit of better stability, ensures all your belongings are on the same working level and it can be more cost-effective!
In this section, you will learn how to remove your current desktop and install an electric UpDown Desk PRO Series frame in a short space of time.
The first thing to establish is just how your desktop is attached to the frame. In 99% of cases, the desktop will be attached with a simple screw/bolt arrangement that can be disassembled only with a screwdriver.
The 2 most common methods of desktop attachment are as follows:
Cam and bolt: Below are some images of the typical cam and bolt arrangement that are commonly used by the likes of IKEA and many other mass-produced flat pack cabinet makers.


Using a screwdriver, simply turning each ‘cam’ 180 degrees anti-clockwise will release the mechanism and the desktop should pop right off.
L bracket: As the name suggests, L brackets will be positioned in up to a dozen places on the underside of your desk attaching the frame to the desktop. Depending on your frame, the L brackets will usually be either welded or screwed to the frame. In nearly all instances, it will simply be 1-3 screws that hold the L bracket to the desktop.
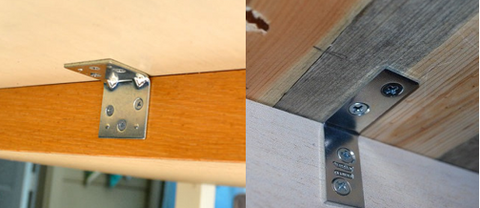
You will find that simply unscrewing as many screws as you can find will loosen the desktop completely and allow you to remove it from the frame with ease.
Assembling Your Desktop Onto A PRO Series Sit Stand Desk Frame
If you’ve removed your desktop, you’ve already completed the hard part. After assembling your PRO Series frame, centrally position the frame upside down on the underside of your desktop as shown below; making sure all ‘A’ dimensions are equal and ensuring both ‘B’ dimensions are equal.

Using a screwdriver and self-tapping screws, affix the frame in 8 (eight) places. Start by screwing in one of the wings as indicated below. Re-measure, adjust if necessary, and then screw a second screw in the diagonally opposite corner wing to ensure the frame is locked in position. All other screws can then be screwed in, in any order.

The full installation process of your old desktop to your new frame is much the same as with any new desktop. You can download the PRO Series Installation manual or view the installation videos here:
https://updowndesk.com.au/pages/setup
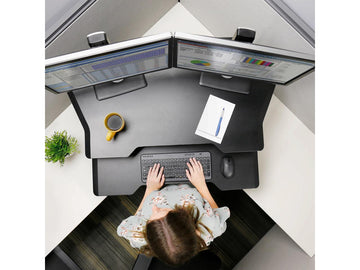
Raising Your Keyboard, Mouse, And Monitor
One of the most straightforward ways to modify an electric sit-stand desk is to place something on top of your desk so that the desk height is high enough for your computer Input and Output tools. Because it doesn’t need to hold the entire weight of your desk and it is common to find things lying around, this method is generally known as the easiest solution.

We have listed a few items that will be able to raise your devices below:
- Chair
- Box(s)
- Books
- Short Table
- Shelves
Anything that will securely hold and elevate your computer, or even just your laptop, will work.
The Advantages And Disadvantages Of This Method
| Advantages | Disadvantages |
|
|
|
You might want to consider other methods if you do a lot of non-computer work at your desk
Raising Your Entire Desk
The second option for modifying your desk is to lift the entire height of the desk by placing something underneath the desk legs. The type of desk legs you have as well as how heavy your desk is will determine what materials you use.
Some of the easiest objects to put under your desk are:
- Milk boxes and crates
- Chairs
- Blocks of wood
- Bed risers
- Vases
- End tables
- Reams of paper, or full paper boxes
There are endless possibilities, all you need to do is to look for objects that are level and sturdy enough to hold the weight of your desk, and just remember that you’ll most likely need four of them.
The Advantages And Disadvantages Of This Method
| Advantages | Disadvantages |
|
|
|
Electric Standing Desks
How do electric standing desks work? The majority of electric standing desks use either a brushed or a brushless motor. A controller activates this little DC (direct current) motor to raise, stop, or lower the desk column (s).
Electric motors used in standing desks must be capable of smoothly raising and lowering loads weighing 200 pounds or more. These compact direct current motors have a high power density.
Brushed motors are simple and inexpensive, but they are sluggish due to the limited high-speed torque. Furthermore, the brushes wear out and require motor maintenance, and the motors can be quite noisy. Brushless motors respond instantly without lag when a button is pressed, and they are more efficient, more robust, and make less noise than typically brushed motor drives.
The power of an electric desk motor is only important when it converts into important factors when operating the desk – adjustment speed and weight capacity. The desk motor should ideally be powerful enough to shift whatever load is on the desk so swiftly that you don't even realize it.
Standing Desk Modification FAQs
Is It Healthy To Stand At Your Desk?
Standing at your desk is a good way to prevent long periods of being seated, which is not healthy. Many experts recommend that you alternate between standing and sitting, in order to change positions throughout the day.
What Is The Correct Height For A Standing Desk?
You should aim to position your desk at elbow height for standing. To do this correctly, you need to bend your arms in an L-shape so that your forearms are parallel to the floor. You also need to then measure the distance from the floor to the bottom of your elbow.
Your desk should be placed at this height when you work. Sit-stand desks can be altered to various heights, this will ensure that you have no issues with finding the correct level for your needs.
Does A Standing Desk Reduce Sitting Time?
Yes, it actually does, but only if you actively make the switch. It is not difficult to do, you just have to remember to regularly make the switch. To help you remember, you could put a note on your desk or set a reminder on your phone or computer to switch positions for 15 minutes out of every hour.
Are Standing Desks Bad For Your Knees?
Standing desks can cause knee pain if you constantly use them throughout the day. To prevent this, you would need to constantly alternate between sitting and standing.
What Is A Standing Desk Converter?
Standing desk converters are adjustable desk units that may be placed on top of an existing work surface. They are a low-cost alternative to getting rid of or shifting your current desk.
Can You Use A Standing Desk Converter With Two Monitors?
Depending on the maximum load capacity of the converter, some standing desk converters can accommodate two monitors. To ensure that it is under the limit, add the weight of the two monitors.